VCR Cassette Repair: A Guide to Fixing Tapes at Home
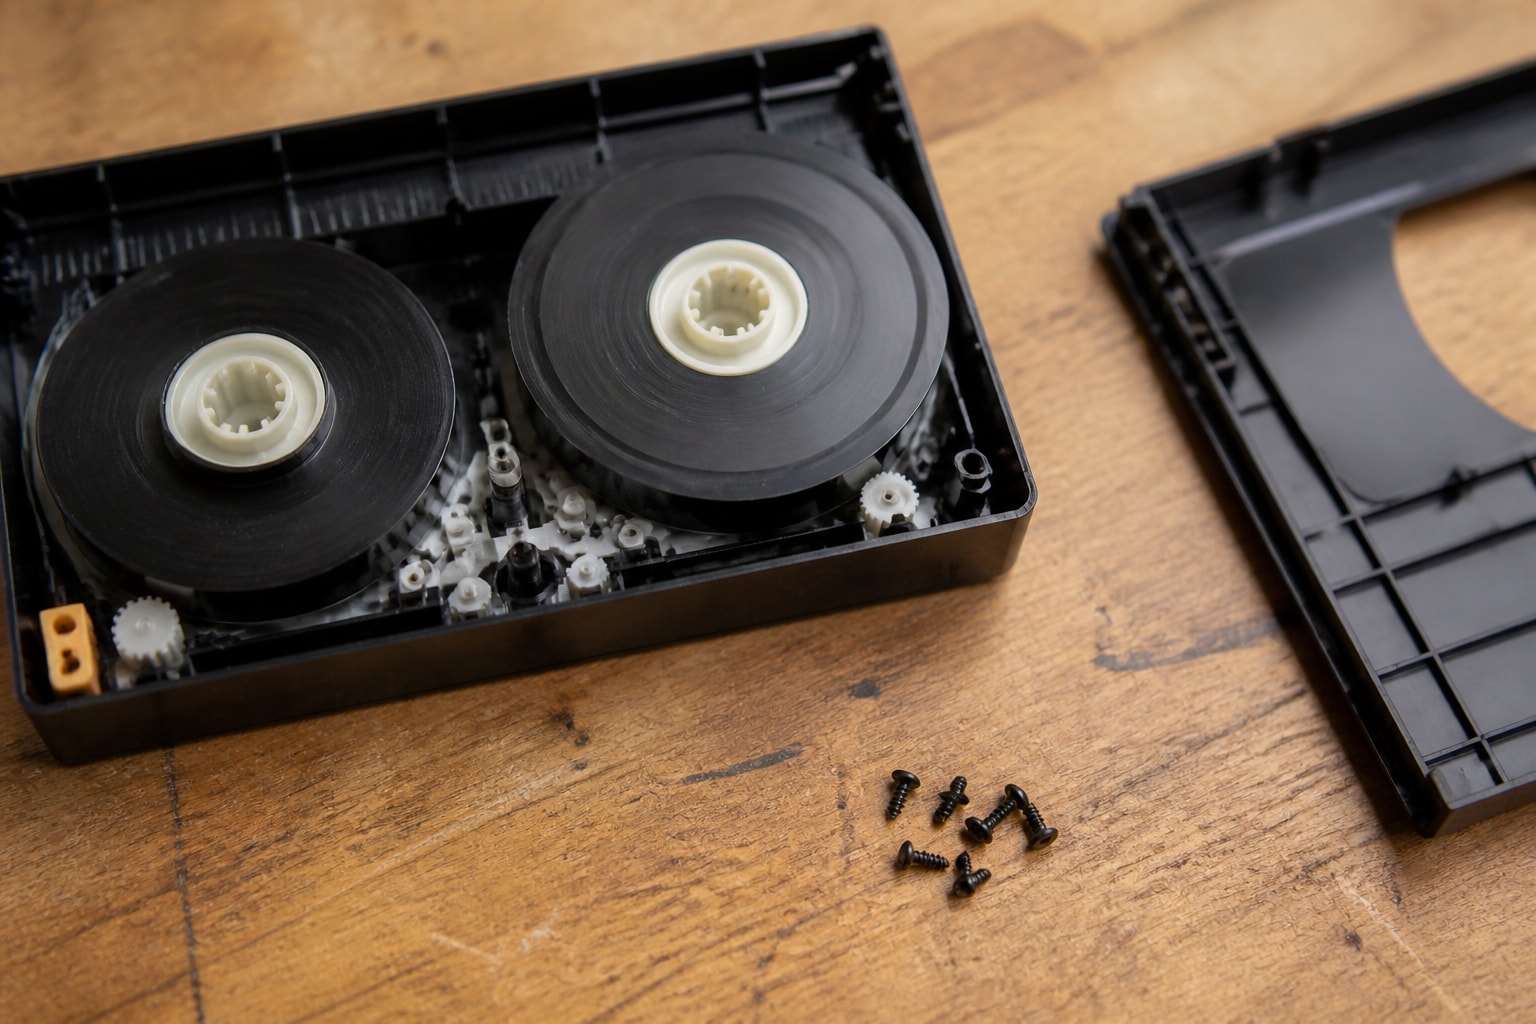
VCR cassette repair is often possible at home when the problem is mechanical, such as a loose shell, a stuck reel or a tape that has slipped off its guides. A snapped tape, mold or a damaged pinch roller path calls for more caution, and sometimes for a specialist. Most repairs involve opening the cassette shell, correcting the tape path and closing it again, usually a quick job that needs only a small Phillips screwdriver and a steady hand.
This guide covers the tools, the most common faults, step-by-step fixes and the point at which a home repair stops being a good idea. It also covers a diagnosis step that many people skip: confirming whether the cassette is the problem or the deck playing it.
What Tools Do You Need for VCR Cassette Repair?
A basic home repair kit for VHS cassettes costs very little and fits in a small box. You need only a handful of items:
- A small Phillips screwdriver (usually #0 or #1) for the five shell screws
- A clean, well-lit work surface with a light-colored cloth or mat so dropped screws are easy to see
- Cotton gloves or nitrile gloves to keep skin oils off the tape
- A pencil or a clean, thin dowel to rewind reels by hand
- A small container for screws, kept in the order you removed them
- A replacement cassette shell, if the original is cracked
Handling matters as much as tools. The U.S. National Archives advises avoiding touching magnetic tape and, where handling is unavoidable, wearing gloves and moving the tape gently without tension or twisting. Treat the tape surface as you would a photographic negative.
Skip adhesive tape, glue and household lubricants. Anything that leaves residue on the tape path will transfer to the heads of the next machine that plays the cassette.
Which Problems Can You Fix Yourself?
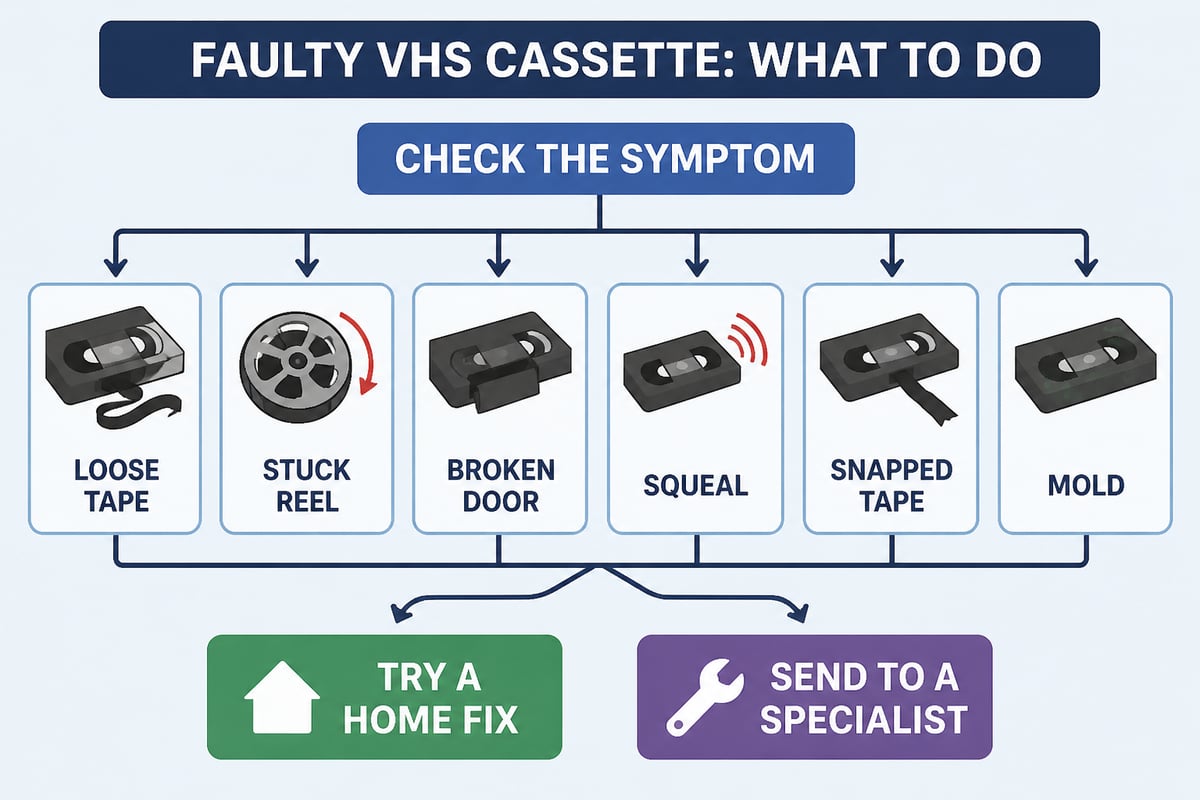
Most home-fixable faults come from the cassette shell and its mechanism, and the tape itself is usually undamaged. Four faults account for the majority of cases.
Loose or Tangled Tape Inside the Shell
If the tape has bunched near the reels or sagged out of the front opening, the shell is usually intact and the tape has simply lost its tension. Remove the screws, lift the top half of the shell away and take the tape back up onto the take-up reel with a pencil.
A Stuck or Seized Reel
A reel that will not turn is often caught on a bent reel-lock spring or a warped shell half. Look at the small white reel lock near the front of the shell. If it is binding, reseat it so it releases when the cassette door opens.
A Broken or Missing Door
The front flap that protects the tape can crack or pop off its hinge. You can swap in a donor shell and move the tape reels across, which is a standard approach for cassettes with cosmetic damage.
Tape Sticking or Squealing in Playback
Squealing usually points to friction in the path or a residue problem. Mild cases improve after the tape is wound end to end once or twice on a healthy deck. Heavy sticking, shedding or a sticky feel is a different issue, covered in the mold section below.
How to Repair a Snapped VHS Tape
A snapped VHS tape can sometimes be reconnected, but the safest approach depends on how much the footage matters. A clean break in the middle of the tape is the easiest case. A tape that has stretched, creased or torn near the leader is harder.
If the recording is irreplaceable, hold off. The U.S. National Archives advises against splicing broken magnetic tape without appropriate training and recommends consulting an audio-video preservation specialist. A bad splice can damage the heads of the deck and the segment around the join.
For a low-stakes tape, the standard home method follows these steps:
- Open the shell and lay the reels flat on your work surface without pulling the tape tight.
- Cut the tape ends square with sharp scissors, trimming away any creased or stretched section.
- Align the two ends on a splicing block, with the shiny base side down and the ends overlapping nothing.
- Apply a single piece of proper splicing tape across the joint, not household tape.
- Trim any overhang flush with the edges and wind the tape onto the take-up reel by hand.
- Close the shell and test the cassette on a deck you can afford to risk.
Expect to lose a few seconds of picture around the splice. If you only plan to transfer the tape once, repair it, play it through and capture it immediately. For more detail on this process, this overview of VHS tape repair covers common break patterns.
Why Does a VCR Keep Ejecting a Tape?
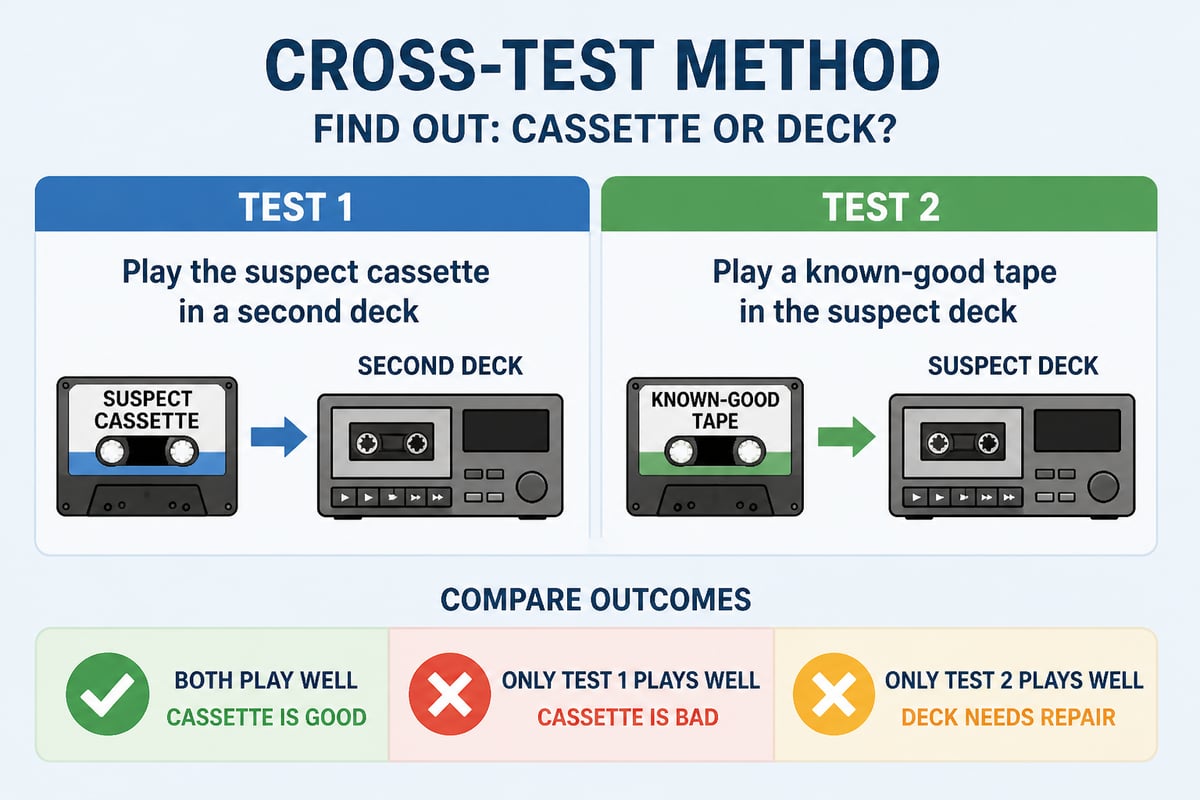
A VCR usually ejects a tape because it cannot confirm the cassette is loaded or cannot thread the tape, and this can come from either the cassette or the deck. Sorting out which one is at fault saves you from repairing a perfectly good tape.
Test the cassette first by trying a known-good tape in the same deck. If the good tape plays, the original cassette is the problem. If the good tape also ejects, the fault is in the machine.
Common causes on the deck side include:
- A worn or slipping belt that prevents the loading motor from completing its cycle
- A dirty or misaligned tape sensor that cannot detect the clear leader
- A failing reel sensor that thinks the tape has stopped moving
- Dried grease in the loading mechanism
Common causes on the cassette side include a damaged leader, a stuck reel lock or a shell that does not sit properly. If the problem sits in the machine, our guide to VCR repair walks through typical mechanical faults, and repairing a VHS player explains what a bench technician checks first.
Can You Check Whether the Deck or the Cassette Is Failing?
Yes, and doing this before opening any shell is the most useful step in the whole process. Cassette repair on a tape that was never faulty can cause the very damage you were trying to avoid.
Run three quick checks:
- Cross-test the cassette. Play it in a second deck. A cassette that plays cleanly elsewhere does not need repair.
- Cross-test the deck. Play a tape you know is healthy. If it jams, squeals or ejects, the deck needs attention.
- Inspect the tape path. Look at the heads, guide posts and pinch roller. Shiny oxide dust on the heads or a glazed roller suggests the deck has been shedding or has gone too long without service.
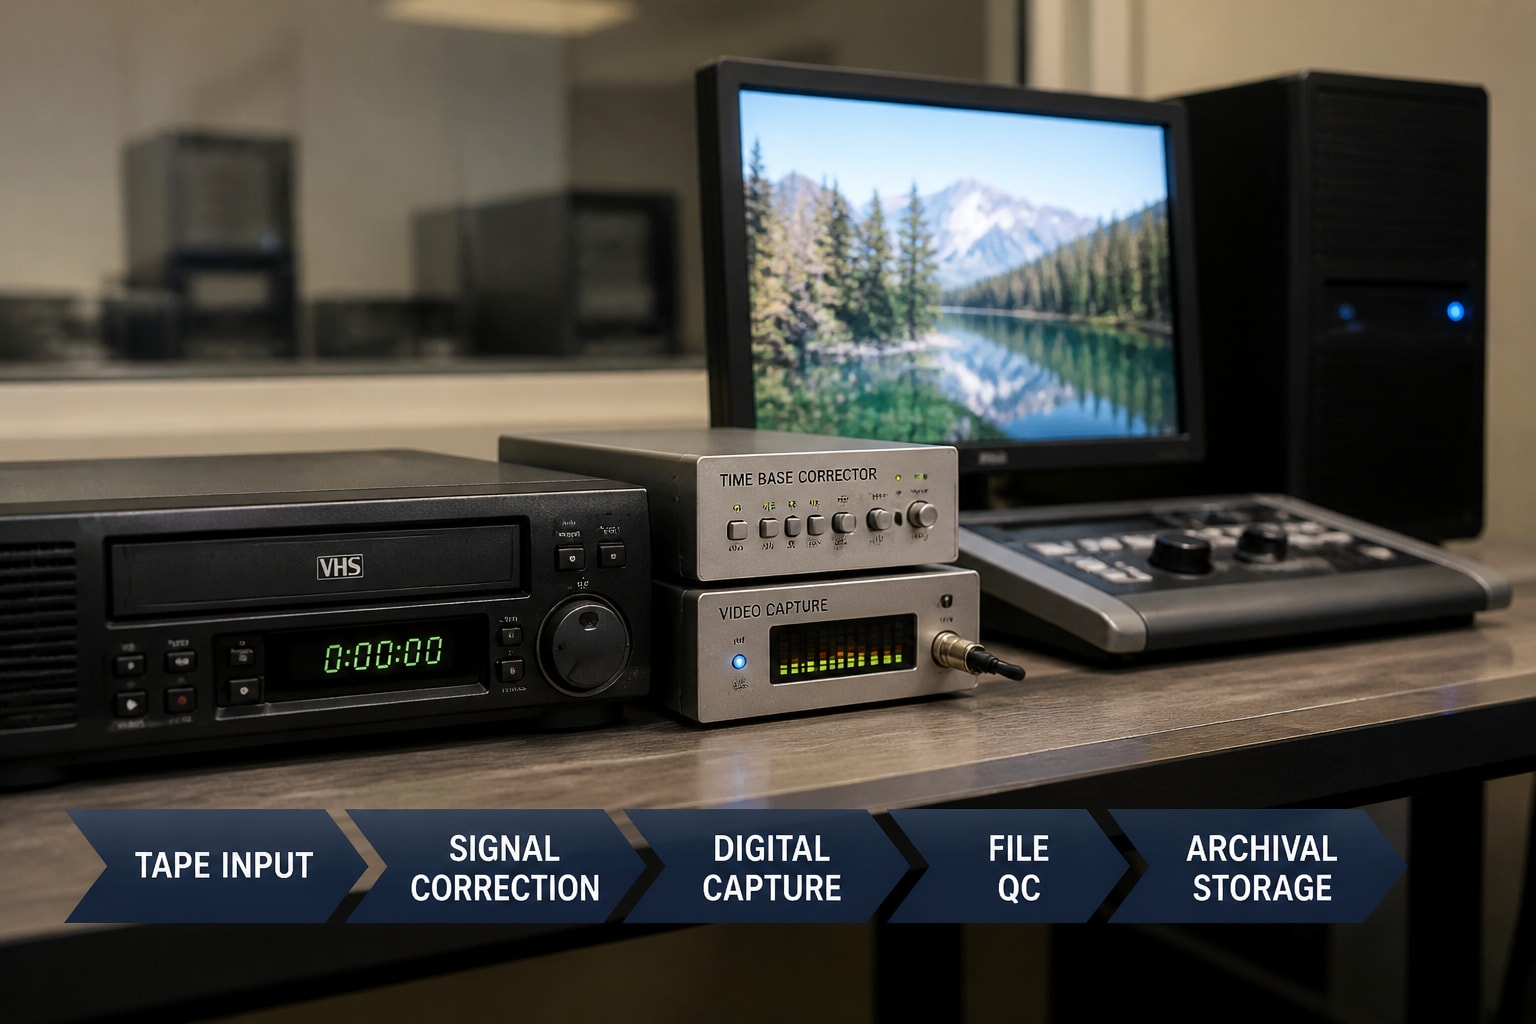
This matters for anyone running a digitization workflow. A faulty deck can chew through a batch of customer tapes, turning a repairable shell problem into a damaged recording. Professional operations treat deck health as part of tape handling. Bench diagnosis and preventive service of customer-owned professional decks are covered on VCR Supply's professional VCR and videotape deck repair page, which is worth a look if a deck is producing unexplained jams or head clogs.
Will a 30-Year-Old VHS Tape Still Work?
An old VHS tape may still play, though its condition depends on how it was stored. Tapes kept in cool, dry rooms in their cases tend to survive far better than tapes left in attics, garages or damp basements.
Storage conditions are the biggest factor. The National Film and Sound Archive of Australia recommends keeping videotape at 18–24°C and 35–45% relative humidity. Moisture is a major enemy: the U.S. National Archives notes that humidity above 65% can contribute to mold growth on magnetic tape.
Age-related problems you may see include:
- Faded or noisy color from oxide loss
- Tracking instability from stretched tape
- Sticky shed, where the binder absorbs moisture and sheds onto the heads
- Warped shells that no longer load properly
A tape showing visible white or gray fuzz is a mold case and should not go into any deck until it has been assessed, because spores can spread to heads and to other tapes on the same shelf. For tapes in good condition, the basics of VHS cassette tape explain why the format has held up as well as it has.
When Is VCR Cassette Repair Not Worth Attempting?
Home repair stops being worthwhile when the risk of damage to the recording outweighs the cost of professional help. Several situations fall into that category.
| Situation | Home repair? | Reason |
|---|---|---|
| Cracked shell, tape intact | Yes | Shell swap is low risk |
| Loose tape near reels | Yes | Rewind by hand with gloves |
| Clean mid-tape snap, low-value tape | Maybe | Splice and transfer once |
| Snap on irreplaceable footage | No | Specialist advised by U.S. National Archives |
| Visible mold or sticky shed | No | Spores spread to heads and other tapes |
| Stretched, creased or crinkled tape | No | Damage grows with each pass |
| Repeated jams on several different tapes | No | Fault is likely in the deck |
For digitization shops, the last row matters most. If more than one tape jams in the same machine, the cassettes are probably fine and the transport needs service. Our overview of VCR tape repair goes further into how those patterns show up in daily work.
Can You Get a VCR Repaired Instead?
Yes, VCRs and professional tape decks can often be repaired, though the pool of technicians and replacement parts has shrunk. Consumer VCRs are often cheaper to replace than repair, but professional decks such as S-VHS, MiniDV, Digital8 and Betamax units are often worth servicing because they are harder to replace and are built for repeated use.
A typical repair involves bench diagnosis, then belt, roller, sensor or head work depending on the fault. If you are weighing options, how a VCR repair shop works describes what to expect, and for local searches, VCR repair near me outlines what to ask a technician before handing over a deck.
How Do You Prevent Cassette Damage in the First Place?
Prevention costs less than any repair and comes down to storage and handling habits.
- Store upright, like books, rather than stacked flat, so the tape pack does not shift
- Keep tapes in their cases to block dust and light
- Control the room, aiming for the 18–24°C and 35–45% humidity range recommended by the National Film and Sound Archive of Australia
- Rewind fully before storage so tension is even across the reel
- Avoid touching the tape, and hold cassettes by the shell only
- Service decks on a schedule, since a dirty or misaligned machine damages more tapes than any shelf ever will
If you have a cassette you are unsure about, your next step is to cross-test it on a second deck before you open the shell, so you know whether the tape or the machine needs attention. If a deck turns out to be the cause, VCR Supply rents and repairs professional videotape decks such as MiniDV, S-VHS, Digital8 and Betamax for digitization shops, with rentals starting at $99 per month and a $45 diagnostic fee for repairs. You can start with professional VCR and videotape deck repair to get a deck diagnosed before it costs you another tape.